Ready to set up Outlook 2007 email to connect with your mail server?
Here is what you will need to have in hand;
- A display name for the email recipient ( Jim Spencer )
- Email address ( jim@jbspartners.com )
- Email password
- Domain name ( jbspartners.com )
- Incoming mail server (mail.jbspartners.com) – if you host with JBS Partners, just replace with your domain name
- Outgoing mail server (mail.jbspartners.com)
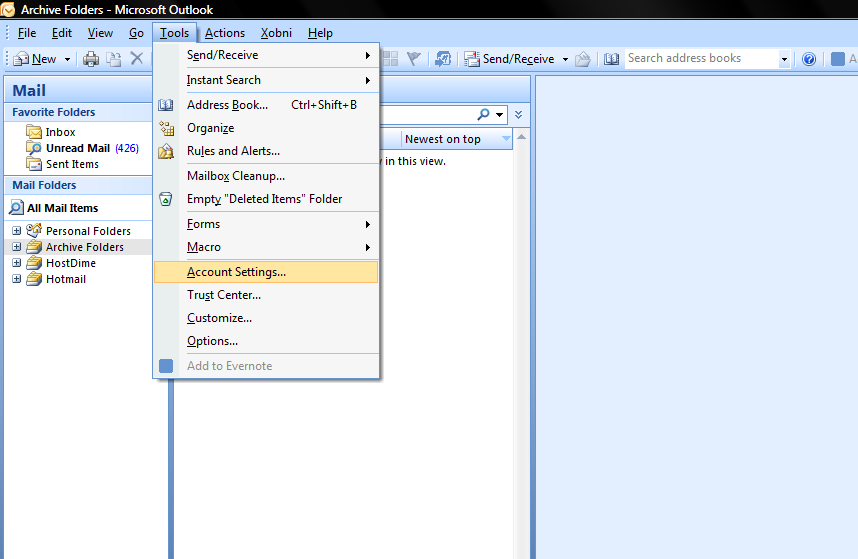
Click on Tools and then Account Settings
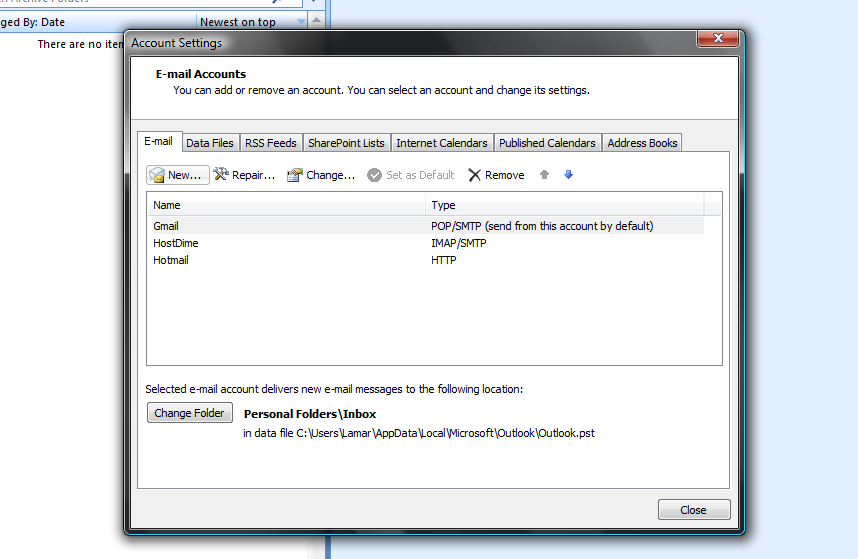
Under the Email tab click on New
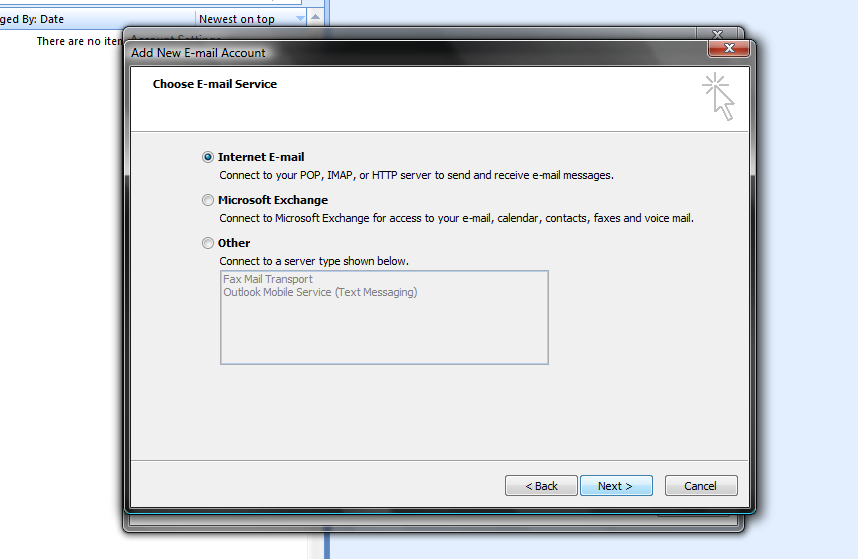
Choose Microsoft Exchange, POP3, IMAP or HTTP
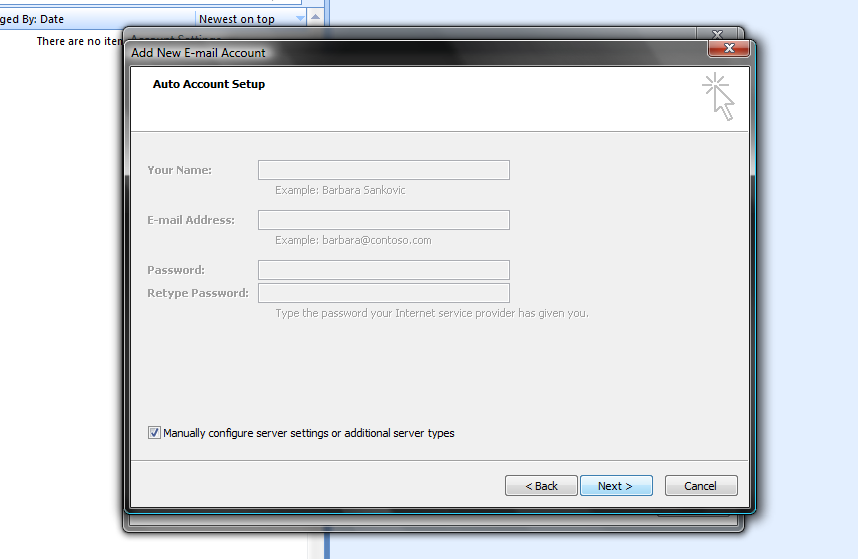
Select the box at the bottom – Manually configure server settings or additional server types, and click Next
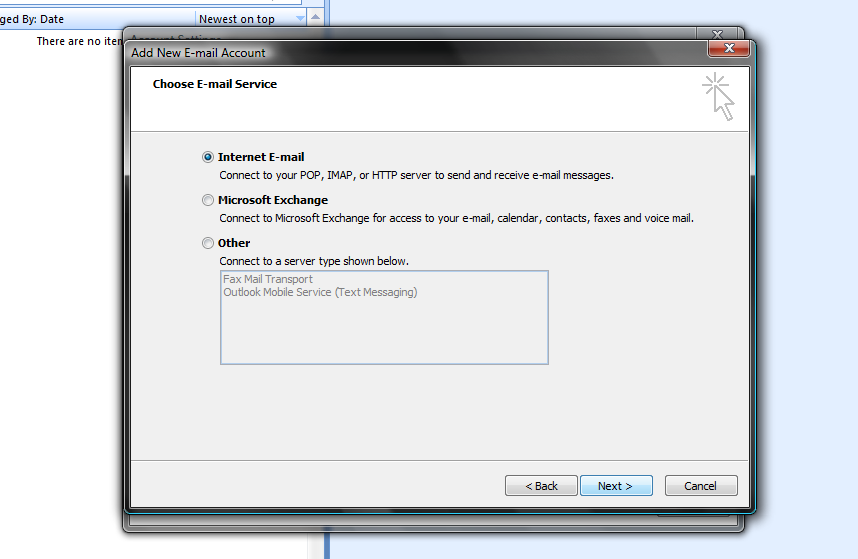
Choose Internet E-mail and click Next
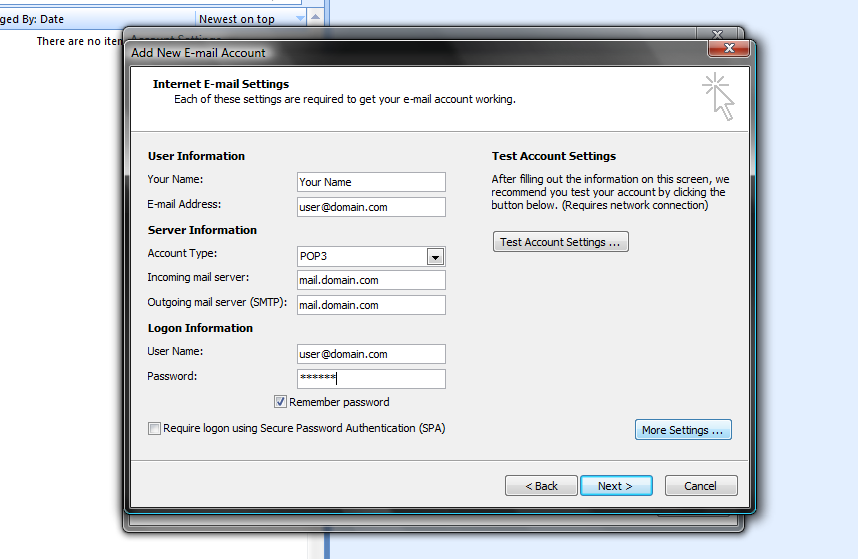
Fill in all the information listed below;
- Your name: How you would like your name displayed in your messages
- E-mail Address: Your full E-mail address example; user@domain.com
- Account Type: Choose either IMAP or POP3
- Incoming mail server: mail.your-domain-name.com
- Outgoing mail server (SMTP): mail.your-domain-name.com
- User Name: Your full e-mail example; user@domain.com
- Password: password for the account
When complete, click the More Settings… button at the bottom right
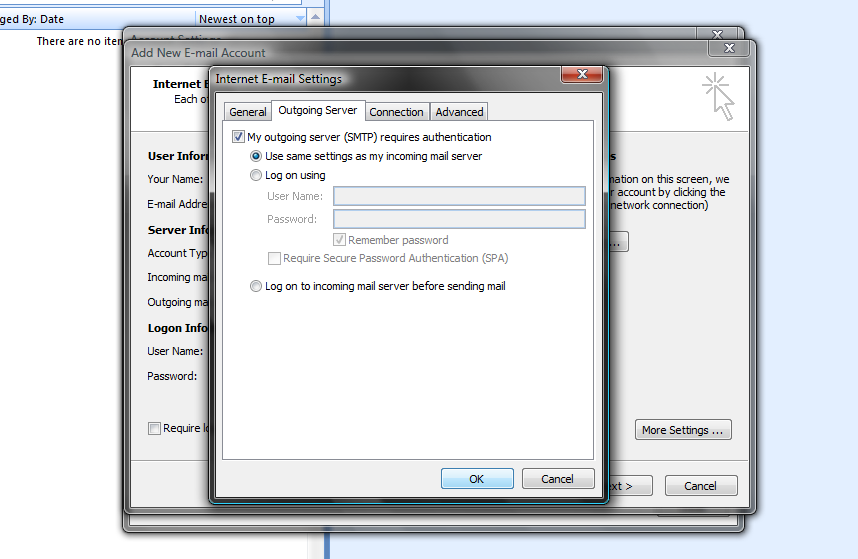
Click on the Outgoing Server tab and
check off My outgoing server (SMTP) requires authentication and
choose Use same settings as my incoming mail server
Then click Next
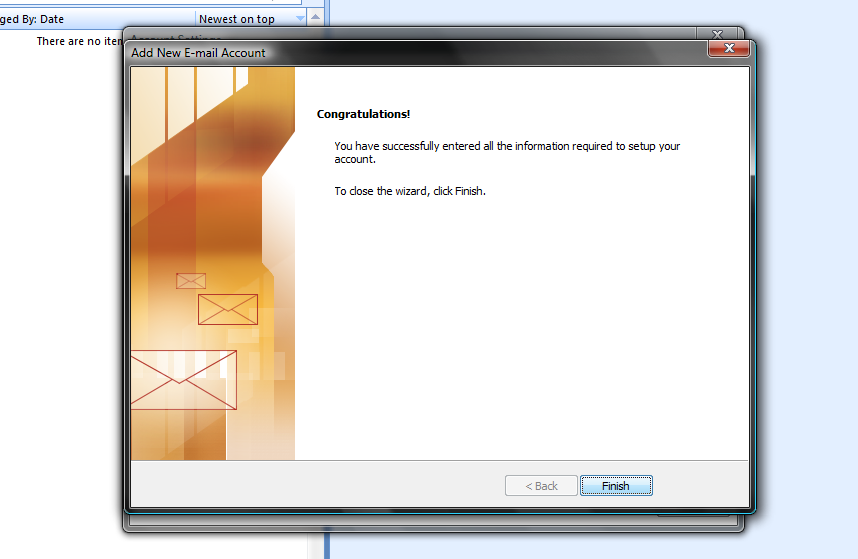
Click on Next, and then Finish to complete your setup!
Congratulations!!!
No Graphics Instructions
1 – Click on Tools and then Account Settings
2 – Under the Email tab click on New
3 – Choose Microsoft Exchange, POP3, IMAP or HTTP
4 – Select the box at the bottom – Manually configure server settings or additional server types, and click Next
5 – Choose Internet E-mail and click Next
Fill in all the information listed below;
- Your name: How you would like your name displayed in your messages
- E-mail Address: Your full E-mail address example; user@domain.com
- Account Type: Choose either IMAP or POP3
- Incoming mail server: mail.your-domain-name.com
- Outgoing mail server (SMTP): mail.your-domain-name.com
- User Name: Your full e-mail example; user@domain.com
- Password: password for the account
6 – When complete, click the More Settings… button at the bottom right
7 – Click on the Outgoing Server tab and
8 – check off My outgoing server (SMTP) requires authentication and
9 – choose Use same settings as my incoming mail server
10 – Then click Next
11 – Click on Next, and then Finish to complete your setup!
Congratulations!!!
Let us know if this was helpful or how we might make it even easier for you.
Note: cPanel hosting accounts have a button to click that will configure your email client for you.


